Installing the plugin
- Maryna Pristrom
Owned by Maryna Pristrom
On this page you will find steps required to:
1) install the JBehaveForJira plugin
2) enable & configure it for a particular project
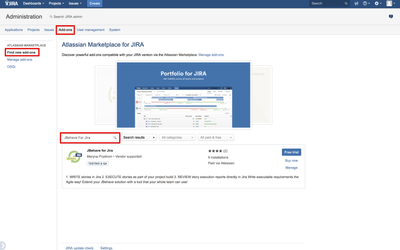
1. Install the plugin
The plugin can be installed via the Jira's built in add-on management functionality. Simply navigate to "Manage add-ons" page in the administration area and then click on "Find New Add-ons" from the menu on the left. Search for the plugin by entering 'JBehave For Jira' in the search box, once loaded follow standard installer steps to complete installation.
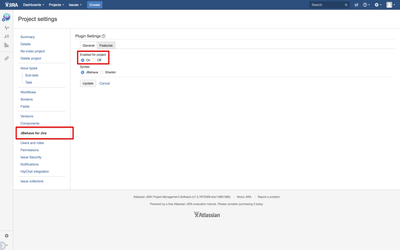
2. Enable it for a specific project
Once you have installed the plugin you will then need to enable it for a specific Jira project(s) via the plugin's configuration page under the Project administration area. Note - you will need to log in with a user account that has "administer project" permission in order to access this area.
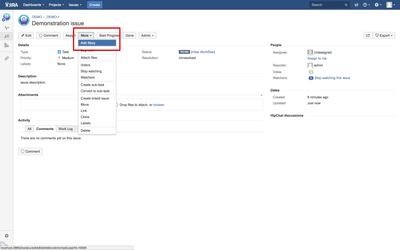
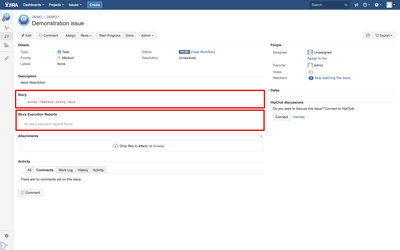
Once enabled then simply navigate to one of the issues in this project and click on the newly available 'Add Story' button from under the More drop down menu.
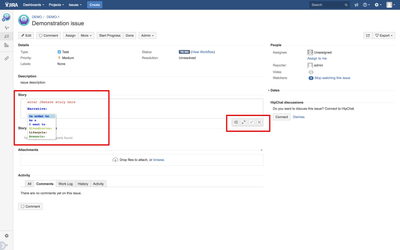
Page will reload with two additional panels: Story - where you write the user story and Story Execution Reports - which shows execution report from running the story uploaded from your CI system.
Simply click inside the Story panel and start writing your story. Hint ! - use Ctr+Space shortcut to show auto completion drop down menu as you type to get suggestions for keywords and step patterns and step parameters.